How To Configure The Buttons on a HighLevel Website

Key Takeaways
- In this tutorial, we’ll explain how to configure the buttons for a HighLevel website.
- This allows you to determine the action(s) that occur when someone clicks a button on your page, and can be fully customized.
- For instructions on specifically configuring the buttons for your navigation menu, skip to Step 3.
In this tutorial, we’ll explain how to configure the buttons for a HighLevel website. This allows you to determine the action(s) that occur when someone clicks a button on your page, and can be fully customized. For instructions on specifically configuring the buttons for your navigation menu, skip to Step 3.
Step 1: Getting Started With Button Configuration
- Navigate to the page page you’d like to edit in HighLevel.
- Select the button to configure.

- Navigate to the left side of the screen to “Button Menu”.
- Scroll all the way down to “Button Actions” > Select from the list.
Step 2: Choose Your Button Actions
- From the “Link To” list, you can choose any of the following options:

Tired of Being the Admin, the Marketer, and the Closer?
You didn't start your business to spend hours building funnels, managing calendars, and chasing follow-ups inside HighLevel. What if someone else handled all of that for you?
Our HighLevel-trained virtual assistants know the platform inside and out — workflows, pipelines, social scheduling, reporting — so you can focus on closing deals and growing your business. Starting at only $164 per week.
- Once you’ve chosen your option for the Button Action from the dropdown, you will need to fill out the remainder of the information needed for that particular action.
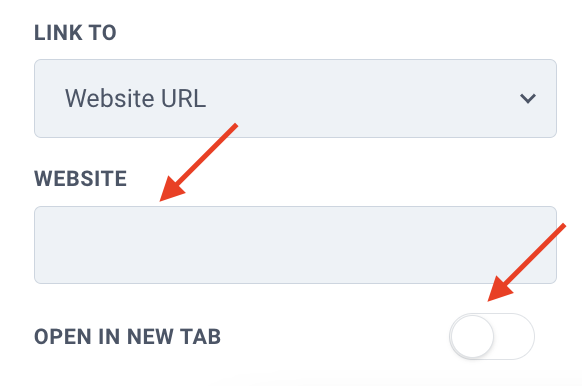
- For example, if you choose “Website URL” you will need to enter the specific URL, and toggle on or off the “Open in New Tab” feature:
- If you choose “Scroll to element” you will need to select an element:

NOTE: If you choose “Website URL” you can choose a link from a hosted file in your Media Library.
Step 3: (Optional) Navigation Menu Configuration
- Select the page you’d like to edit.
- NOTE: When editing the buttons on a navigation menu, you will need to configure the buttons on each website page.
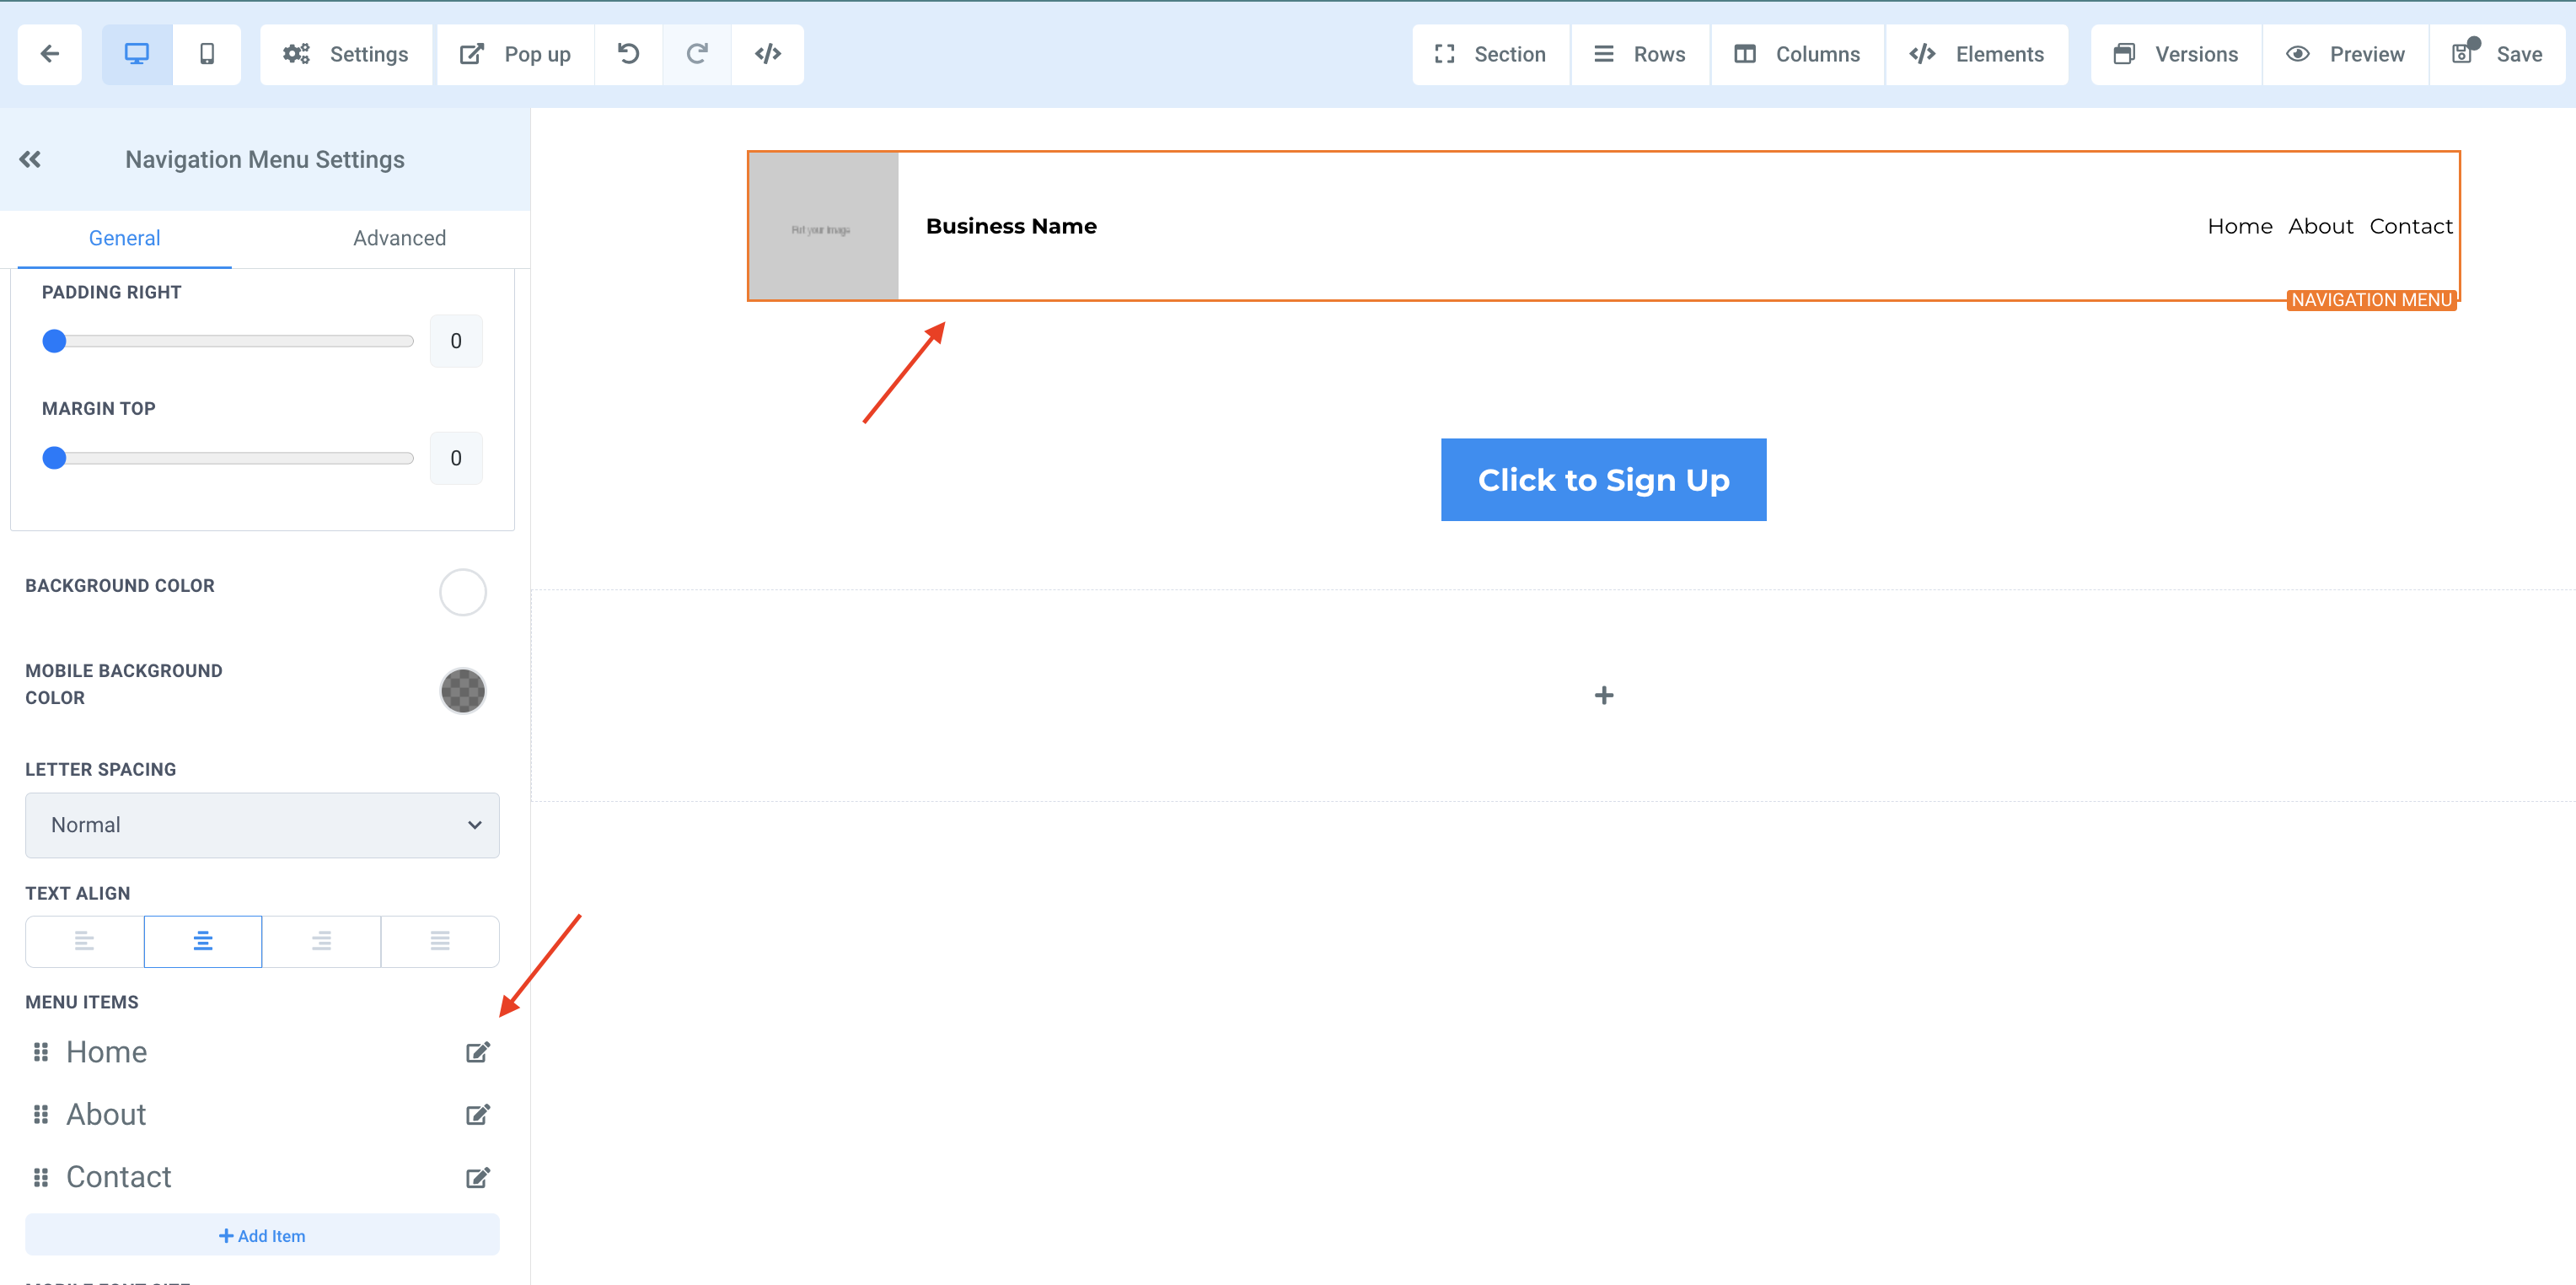
- Select Navigation Menu.
- Navigate to “Navigation Menu Settings” on the left-hand side.
- Scroll down to “Menu Items” > Select “Edit” on the button you’d like to configure.
- In the popup, enter the website URL or the page you’d like to assign the button to > Click “Submit”.

- Repeat this step for each button.
- Once ALL of the navigation menu buttons have been configured, click “Save” to confirm your updates/changes.
- Repeat steps 1-3 for the remaining pages.
The Complete Operator's Playbook
Weekly strategies from top-performing agencies
Join 5,000+ operators who get weekly tutorials, templates, and strategies that are actually working right now.
Matt @ HLPT
Founder, HL Pro Tools
Matt and his team of 250+ are known for making it easy to win with GoHighLevel. They bundle tools, trainings and team time for a complete solution. You can use them for all your HighLevel needs from white label support to done-for-you fractional marketing services.
Related Articles
How to Command Ask AI in HighLevel
You are in the zone, building out a massive new campaign for a client. But then the friction hits. You need to write three different emails,
HighLevel Website Builder 101: The Complete Guide to Building a Website From Scratch
Learn how to build a website from scratch in HighLevel. This complete guide covers the website builder, page creation, sections, elements, s
HighLevel WordPress Migration 101: The Complete Guide to Migrating Your WordPress Site
Learn how to migrate your WordPress site to HighLevel. This complete guide covers content migration, page recreation, domain transfer, SEO p